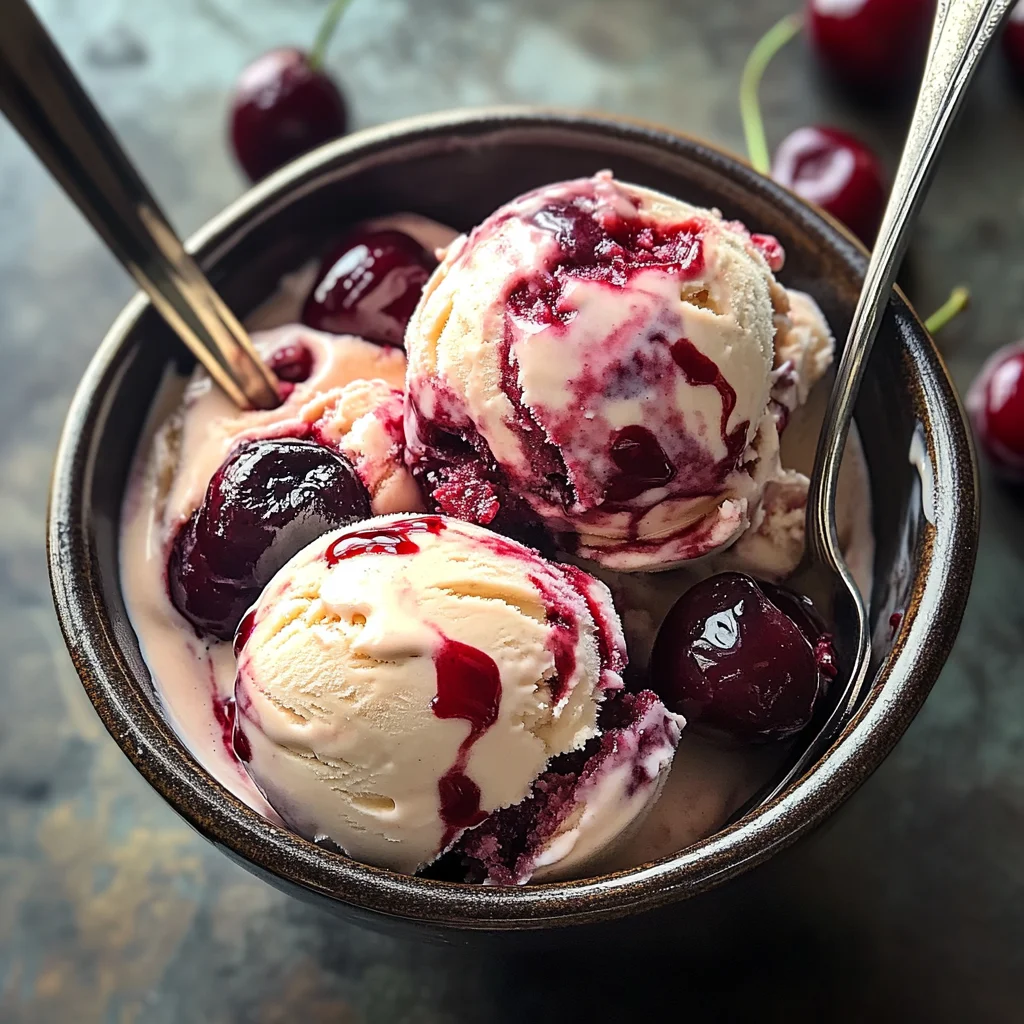
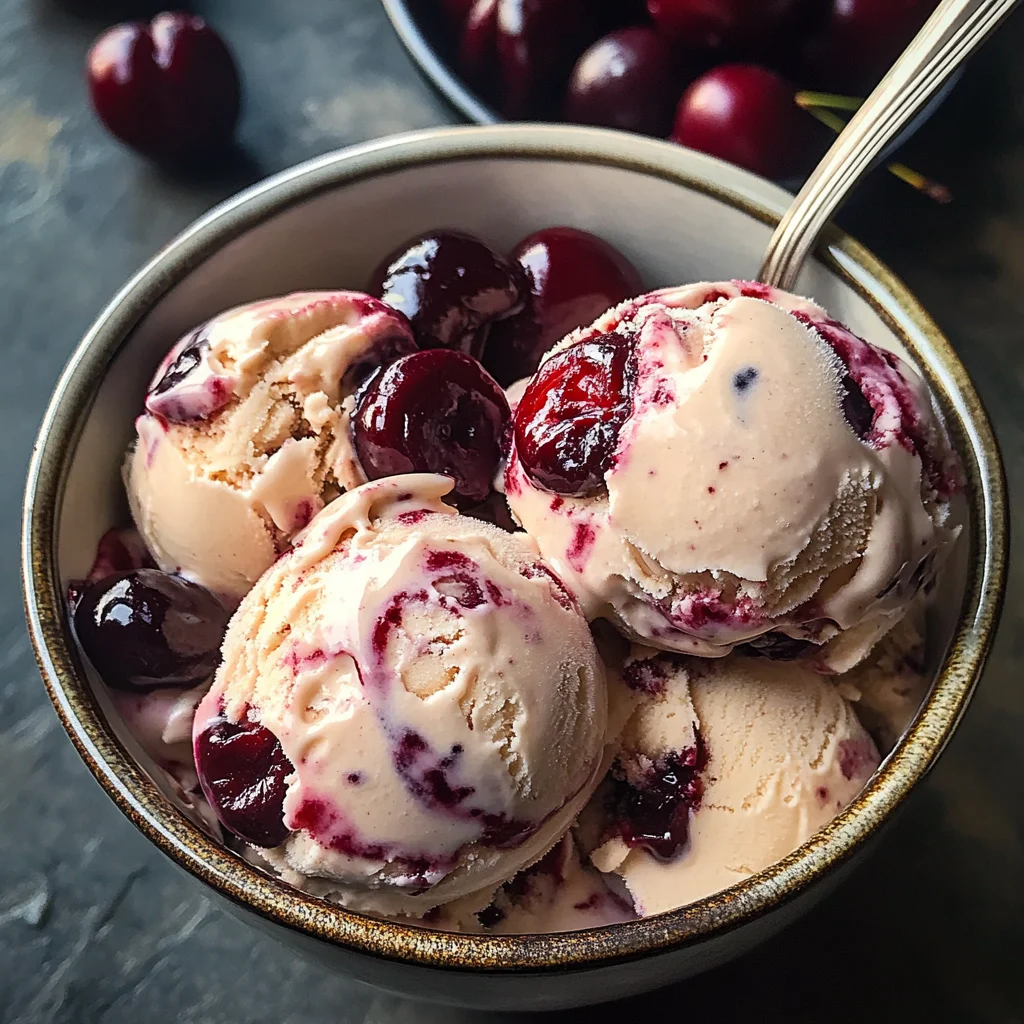
If you’re looking for a sweet escape this summer, you’ve come to the right place! Cherry cheesecake ice cream is one of those magical treats that seems to capture sunshine in a scoop. It combines the rich, creamy goodness of cheesecake with the bright, vibrant flavor of fresh cherries. This no-churn recipe is perfect for warm afternoons or cozy nights spent with family and friends. Just imagine indulging in a bowl of this delightful ice cream while reminiscing about cherished moments!
This recipe is not only delicious but also incredibly easy to whip up. Whether you’re hosting a family gathering or simply treating yourself after a long day, cherry cheesecake ice cream will surely bring smiles all around.
Why You’ll Love This Recipe
- No Churn Required: You don’t need an ice cream maker; just a few simple steps and your freezer will do the rest!
- Perfect for Any Occasion: Whether it’s a summer barbecue or a cozy movie night, this dessert fits right in.
- Family-Friendly Delight: Kids and adults alike will love the sweet-tart cherry flavor and creamy texture.
- Make Ahead Convenience: Prepare it in advance and have it ready whenever the craving strikes.
- Customizable Options: You can easily switch up the flavors to suit your taste!
Ingredients You’ll Need
To make this delightful cherry cheesecake ice cream, you’ll need some simple, wholesome ingredients that you might already have in your pantry. Here’s what you’ll gather:
- 2 cups fresh cherries, pitted and halved
- 8 oz cream cheese, softened
- 1 cup heavy cream
- 1 cup sweetened condensed milk
- ½ cup granulated sugar
- 1 tsp vanilla extract
Variations
One of the best things about cherry cheesecake ice cream is how flexible it is! You can easily mix things up to create your own unique version. Here are some fun ideas:
- Try Different Fruits: Swap out cherries for strawberries or blueberries for a new twist on flavor!
- Add Crunchy Texture: Mix in crushed graham crackers before freezing for that classic cheesecake crust experience.
- Experiment with Flavors: Add in some lemon zest or almond extract for an extra layer of deliciousness.
- Make it Dairy-Free: Use coconut cream and dairy-free cream cheese alternatives to enjoy this treat without dairy.
How to Make Cherry Cheesecake Ice Cream
Step 1: Prepare the Cherries
In a saucepan over medium heat, combine your pitted cherries with sugar to taste. Let them simmer for about 5 minutes until they become soft and release their lovely juices. This step enhances their natural sweetness and creates a delightful syrup that will swirl throughout your ice cream.
Step 2: Blend the Base
In a mixing bowl, beat together the heavy cream, softened cream cheese, sweetened condensed milk, and vanilla extract until smooth. This creamy mixture forms the base of your ice cream and ensures every bite is rich and satisfying.
Step 3: Fold in Cherry Mixture
Gently fold in your prepared cherry halves along with their syrup from the saucepan into the creamy base. This adds bursts of fruity flavor throughout your ice cream while keeping it beautifully swirled.
Step 4: Freeze Your Ice Cream
Transfer the mixture into an airtight container and freeze for about 6 hours or until firm. This step transforms your creamy blend into luscious scoops of cherry cheesecake goodness!
Step 5: Serve & Enjoy
When you’re ready to indulge, allow the ice cream to sit at room temperature for a few minutes before scooping into bowls or cones. For an extra treat, top with whipped cream if desired. Enjoy every spoonful!
Pro Tips for Making Cherry Cheesecake Ice Cream
Creating the perfect cherry cheesecake ice cream is a breeze with these handy tips!
-
Use Fresh Cherries: Fresh cherries not only provide the best flavor but also add a delightful texture to your ice cream. If fresh cherries are out of season, frozen ones can work too; just make sure they’re pitted and thawed before use.
-
Room Temperature Ingredients: Let your cream cheese soften to room temperature before mixing. This ensures a smooth and creamy base, preventing any lumps from forming in your ice cream.
-
Chill Your Mixture: Before freezing, allow your mixture to chill in the refrigerator for about an hour. This helps the flavors meld together beautifully and promotes a smoother texture when frozen.
-
Experiment with Add-Ins: Don’t hesitate to get creative! Mixing in crushed graham crackers can simulate that classic cheesecake crust, while other fruits like strawberries or blueberries can give a fun twist on flavors.
-
Don’t Rush the Freezing: Make sure to freeze your ice cream for at least 6 hours or until fully firm. If you’re impatient, just remember that quality takes time—trust me, it’s worth it!
How to Serve Cherry Cheesecake Ice Cream
Presenting your cherry cheesecake ice cream can be just as fun as making it! There are several exciting ways to serve this delicious treat that will impress your family and friends.
Garnishes
- Whipped Cream: A dollop of whipped cream adds a light and airy touch, perfectly complementing the rich flavor of the ice cream.
- Chocolate Drizzle: A drizzle of chocolate syrup provides a sweet contrast that enhances the overall dessert experience.
- Chopped Nuts: Sprinkling some chopped nuts like almonds or pecans gives a delightful crunch that balances out the creaminess.
Side Dishes
- Fruit Salad: A refreshing fruit salad made with seasonal fruits adds brightness and complements the sweetness of the ice cream.
- Brownie Bites: Rich, fudgy brownie bites pair wonderfully with cherry cheesecake ice cream, providing an indulgent contrast in flavors and textures.
- Shortbread Cookies: Crisp shortbread cookies offer a buttery crunch that works beautifully alongside the creamy softness of the ice cream.
- Chocolate Chip Muffins: These warm muffins create a comforting pairing with cold ice cream, making for an enjoyable dessert experience.
With these serving ideas and tips, you’ll be ready to enjoy your cherry cheesecake ice cream like never before! Whether you’re sharing it at a gathering or indulging on your own, this dessert is sure to bring smiles all around. Happy scooping!
Make Ahead and Storage
This Cherry Cheesecake Ice Cream is perfect for meal prep! You can make it ahead of time and store it in your freezer, ensuring you have a refreshing treat ready whenever the craving hits.
Storing Leftovers
- Store any leftover ice cream in an airtight container to keep it fresh.
- If you have multiple layers, place a piece of parchment paper between each layer to avoid ice crystals.
- Consume within two weeks for the best flavor and texture.
Freezing
- After mixing, pour the ice cream mixture into an airtight container.
- Ensure it’s sealed tightly to prevent freezer burn.
- Freeze for at least 6 hours or until firm, but you can keep it frozen longer if needed.
Reheating
- If your ice cream becomes too hard to scoop, let it sit at room temperature for about 10 minutes before serving.
- Use a warm scoop for easier serving; just run the scoop under hot water for a few seconds.
FAQs
Here are some common questions that might come up while making this delicious dessert.
Can I use frozen cherries for Cherry Cheesecake Ice Cream?
Absolutely! Frozen cherries work well in this recipe. Just thaw them slightly before combining with sugar on the stove.
How long does Cherry Cheesecake Ice Cream last in the freezer?
When stored properly in an airtight container, your Cherry Cheesecake Ice Cream will maintain its quality for about two weeks in the freezer.
Can I make Cherry Cheesecake Ice Cream without heavy cream?
While heavy cream gives that rich texture, you can substitute it with coconut cream or another non-dairy alternative for a lighter version.
What other fruits can I use in my Cherry Cheesecake Ice Cream?
Feel free to experiment with other fruits like strawberries, blueberries, or raspberries. Each will bring its own unique flavor profile!
Final Thoughts
I hope you enjoy making this delightful Cherry Cheesecake Ice Cream as much as I do! It’s a special recipe that brings back memories of sunny days and joyful gatherings. Don’t hesitate to invite friends over to share this sweet treat or simply indulge yourself after a long day. Remember, every scoop is a reminder of life’s little pleasures. Happy scooping!
Cherry Cheesecake Ice Cream
- Prep Time: 15 minutes
- Cook Time: 5 minutes
- Total Time: 20 minutes
- Yield: Approximately 6 servings 1x
- Category: Dessert
- Method: Freezing
- Cuisine: American
Description
If you’re in search of a refreshing summer treat, look no further than this luscious Cherry Cheesecake Ice Cream! This delightful no-churn dessert beautifully marries the creamy richness of cheesecake with the vibrant sweetness of fresh cherries. Perfect for warm days or cozy nights, it’s an easy recipe that will impress friends and family alike. Simply gather your ingredients, follow a few straightforward steps, and let your freezer do the hard work. Each scoop promises to transport you to sunny afternoons filled with laughter and joy. Treat yourself to this indulgent yet simple dessert that’s sure to become a favorite!
Ingredients
- 2 cups fresh cherries, pitted and halved
- 8 oz cream cheese, softened
- 1 cup heavy cream
- 1 cup sweetened condensed milk
- ½ cup granulated sugar
- 1 tsp vanilla extract
Instructions
- In a saucepan over medium heat, combine pitted cherries and sugar; simmer for about 5 minutes until soft.
- In a mixing bowl, beat together heavy cream, softened cream cheese, sweetened condensed milk, and vanilla until smooth.
- Gently fold in the cherry mixture along with its syrup into the creamy base.
- Pour the mixture into an airtight container and freeze for about 6 hours or until firm.
- Before serving, let the ice cream sit at room temperature for a few minutes for easier scooping.
Nutrition
- Serving Size: ½ cup (120g)
- Calories: 290
- Sugar: 27g
- Sodium: 70mg
- Fat: 18g
- Saturated Fat: 10g
- Unsaturated Fat: 7g
- Trans Fat: 0g
- Carbohydrates: 29g
- Fiber: 1g
- Protein: 3g
- Cholesterol: 55mg

Leave a Comment